Hello, my name is Tony! I have been photographing the night sky and the northern lights since 2012 and since 2014 I have been doing it every night as part of my job as an aurora guide. I will try to keep this guide as short and sweet as possible. I’ll give you the basics to quickly start getting decent aurora pictures. I won’t give an A-Z of photography or overwhelm you with jargon.
As an aurora guide, driving along the road with a bus full of people chasing auroras, I don’t have time to mess about with the camera, get the perfect foreground or perfect angles. If the aurora suddenly appears then I have to quickly get the camera out of my bag and start clicking, or I could miss it. So for me the no.1 most important rule is to be familiar with your camera equipment. For me, the camera is a tool of my job. Like a mechanic has a wrench and a builder has a shovel. A camera is my work tool and I need it to just work when I need it to, with no messing around.
I quite often see people come to Lapland and they have borrowed a very good camera from someone, but they have no idea how to use it. They quickly start trying to learn to use the camera right there and then as the aurora is flying overhead! Thus the pictures they take are pretty shaky, at best. On our tours I give you all my pictures that I take anyway, so no harm done really, but it does feel nice to get an epic aurora picture yourself to hang on the wall and say to people I took that! Right?!
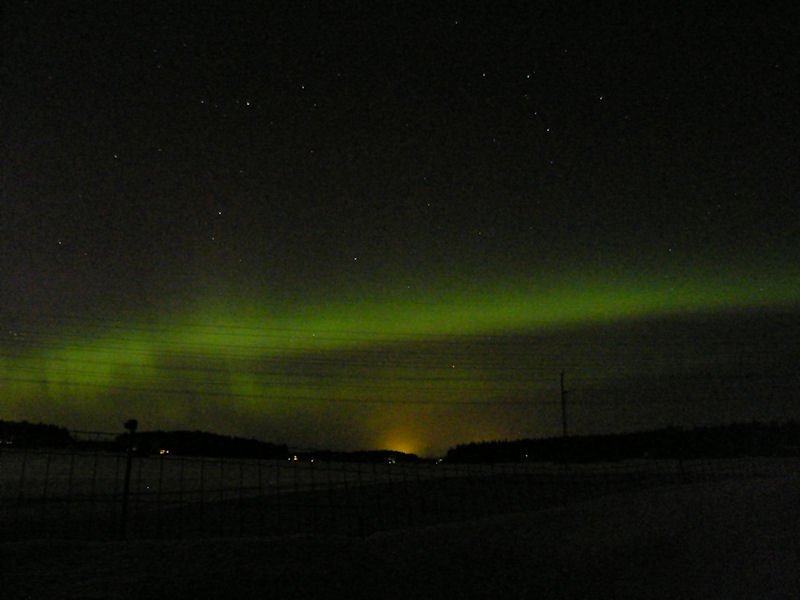
So before you get anywhere near the aurora, get familiar with your camera. You can even practice night photography inside your house with the lights off, you don’t actually have to go outside just yet. But outside is better, so if you have a garden, even better. As you are practising to use your camera, we aren’t dealing with film anymore, so it is absolutely ok to make bad photos. Making bad photos is actually key to learn how to take good photos. So if you take some shots that are out of focus, or underexposed/exposed, noisy as heck, it doesn’t matter! Figure out why that might have happened, tweak the ISO or exposure time, and shoot again. Every single one of us, took our very first aurora photograph at some point! In fact here is my first ever aurora picture:
Ok so let’s get down to it. What you need for good night photography (and thus good aurora photography), is to allow lots of light to hit the camera sensor. But you are in a very dark environment, so how can you gather as much light as possible? There are three ways we do this. A wide aperture, a long exposure and high ISO. But the most important aspect is to have a lens (or fixed camera) with a wide aperture as possible, if you have that, then it makes the rest of the process much easier and the pictures much cleaner/less noisy.
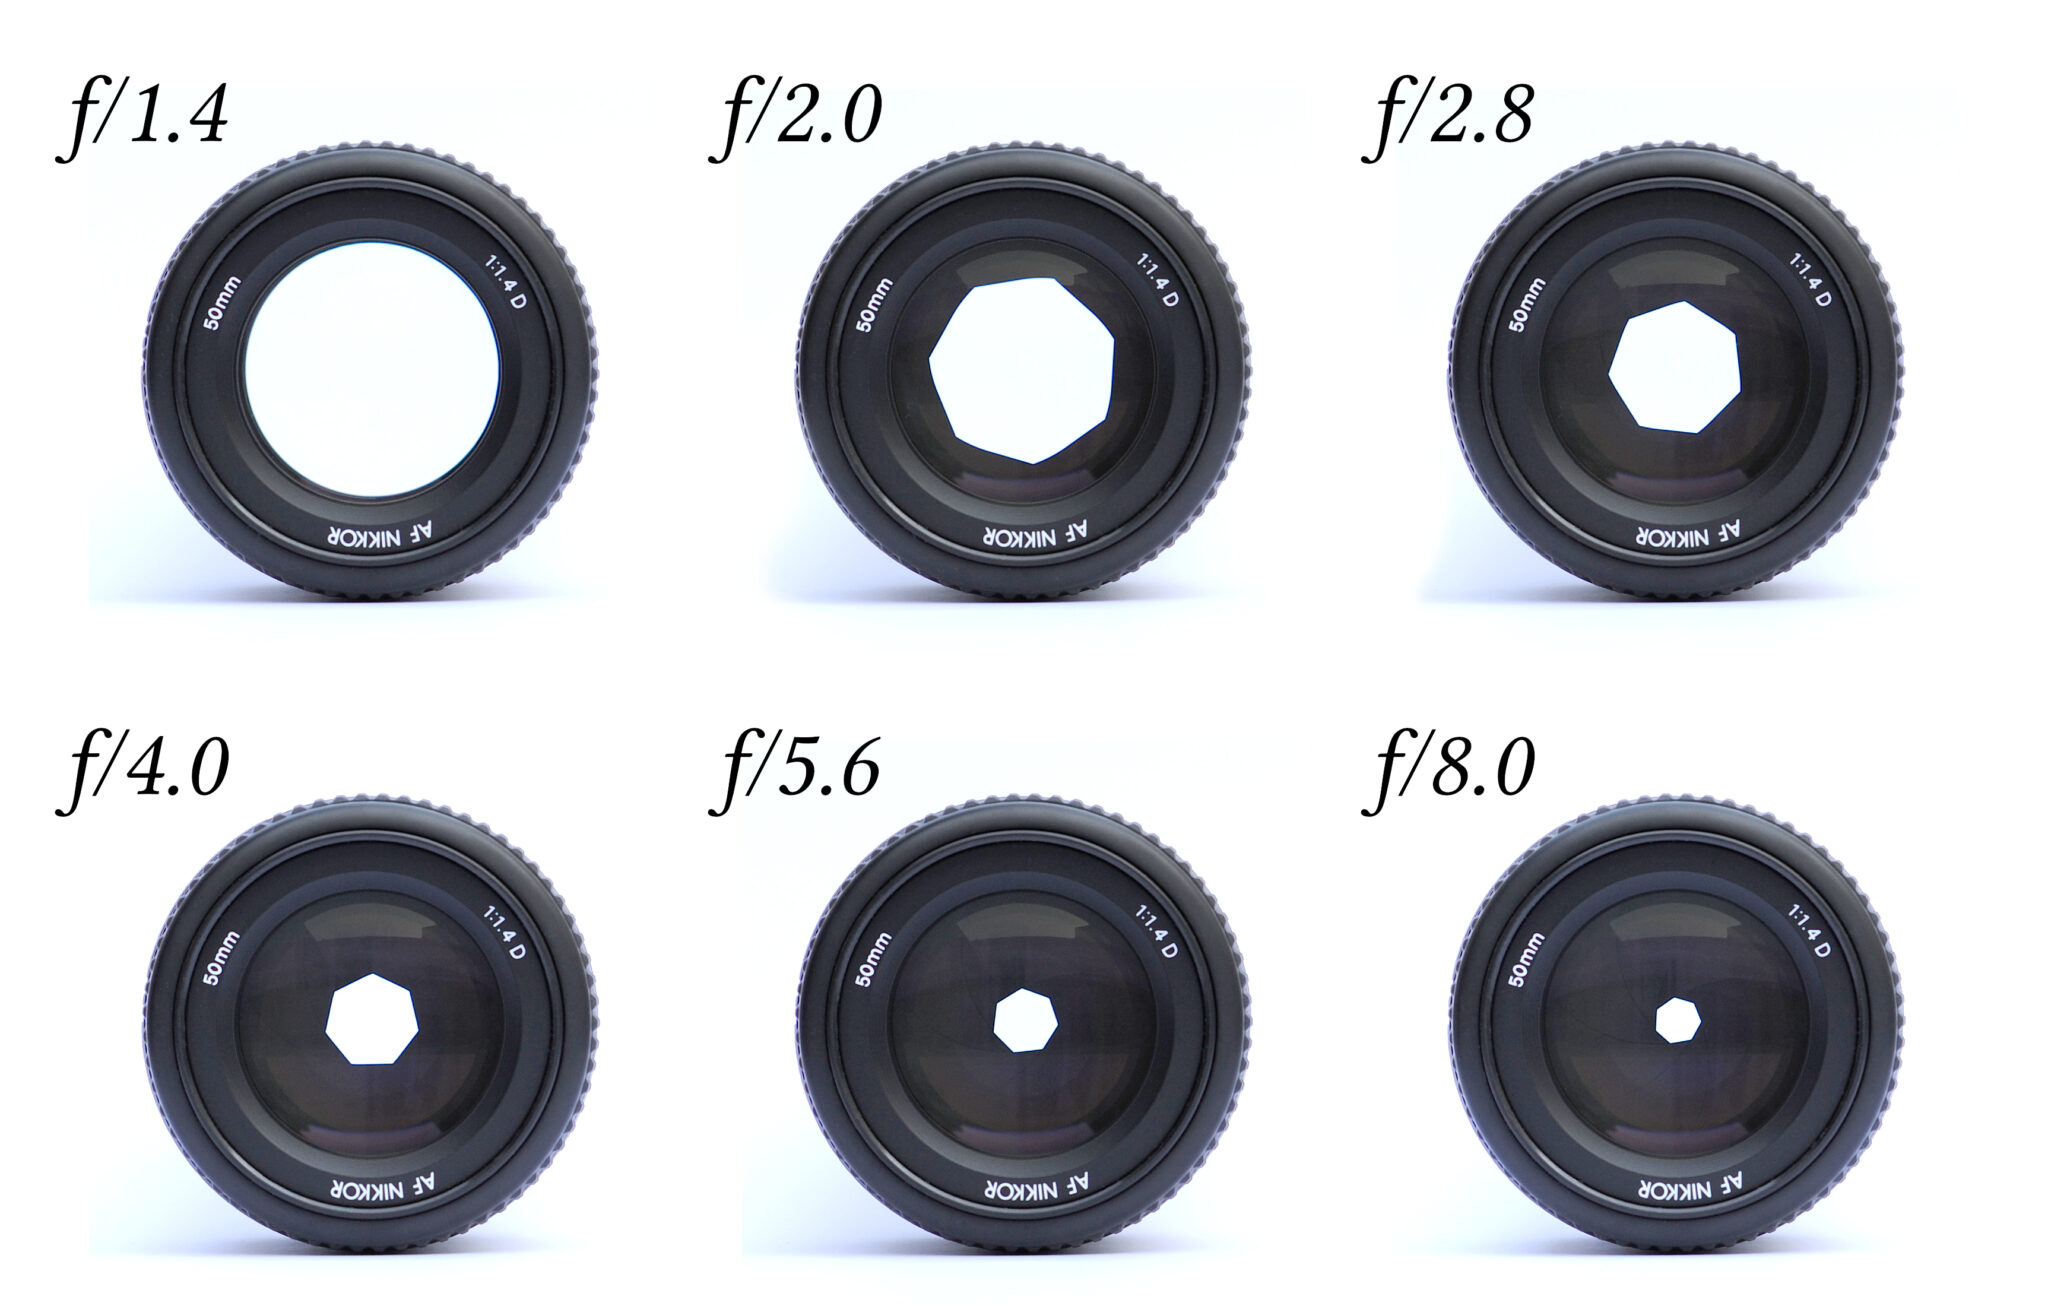
With northern lights photography, we generally want at least an f2.8 lens, but if you can get an f2 lens (or even a f1.something lens!), then even better. The bigger aperture you have, the less ISO you need. So you usually always will shoot with as wide aperture as possible. There are caveats to this which I won’t go into here (if there is lots of snow and a full moon for example, you may not need maximum aperture), but for 99% of aurora photography, wide open aperture (as we call it) is what you will use. Now let’s talk about ISO.
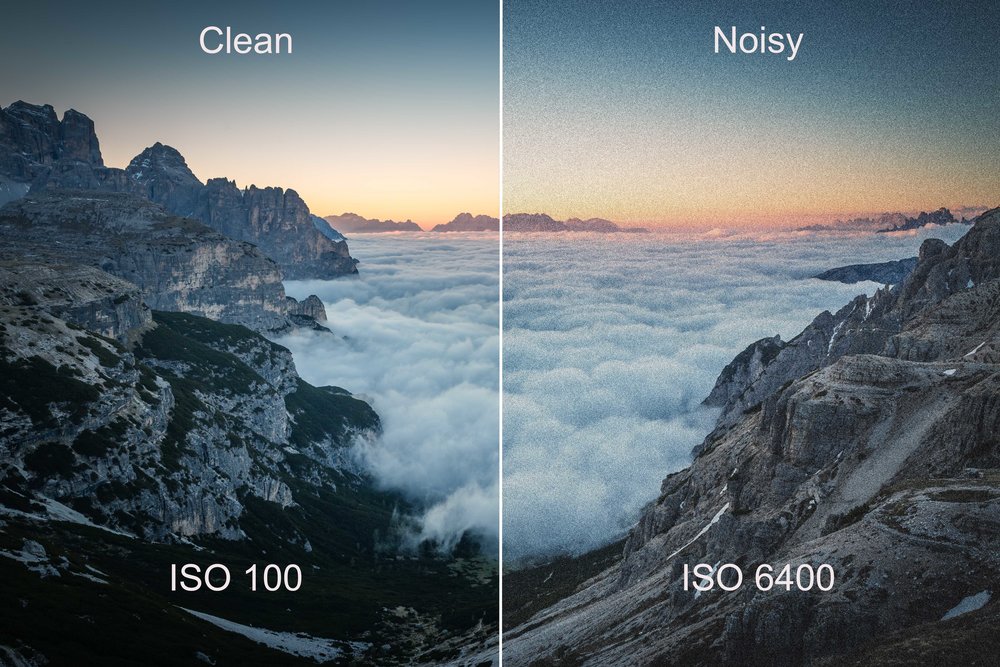
Think of ISO as an amplifier for your camera sensor. Like a music amplifier, the more you crank it up, the more the sound becomes distorted. If you turn it up to 11 (ala Spinal Tap), you’ll just get terrible sound. The same is with a camera sensor. The more you crank the ISO up, the more noise is introduced into your image. But we do need to crank the ISO up, because we can’t shoot at ISO 100 like in daylight. We do need to amplify the sensor a little to allow it capture more light. This is where having the biggest aperture possible really helps, because the bigger aperture lens you have, the less ISO you need. Thus the less noise you will introduce into your image. Typically, we shoot at 800, 1600 or 3200 ISO. But it really depends on your camera what ISO you choose. Because each camera make and model is different. My camera a Sony A7S can have quite high, say 3200 ISO, and still give clean images without too much ISO noise, but other cameras can be a real car crash at the same 3200 IS0. So this is where practising in your yard at night is useful, not only are you familiarizing yourself with your camera so you aren’t fumbling with it under epic aurora, but you will learn at what ISO your pictures become too grainy and ugly. You will find the sweet spot. A good baseline is to start at ISO 800 and work up from there. If your high ISO is noisy as heck, you can keep it a little lower and we can simply have a slightly longer exposure time to let more light in.
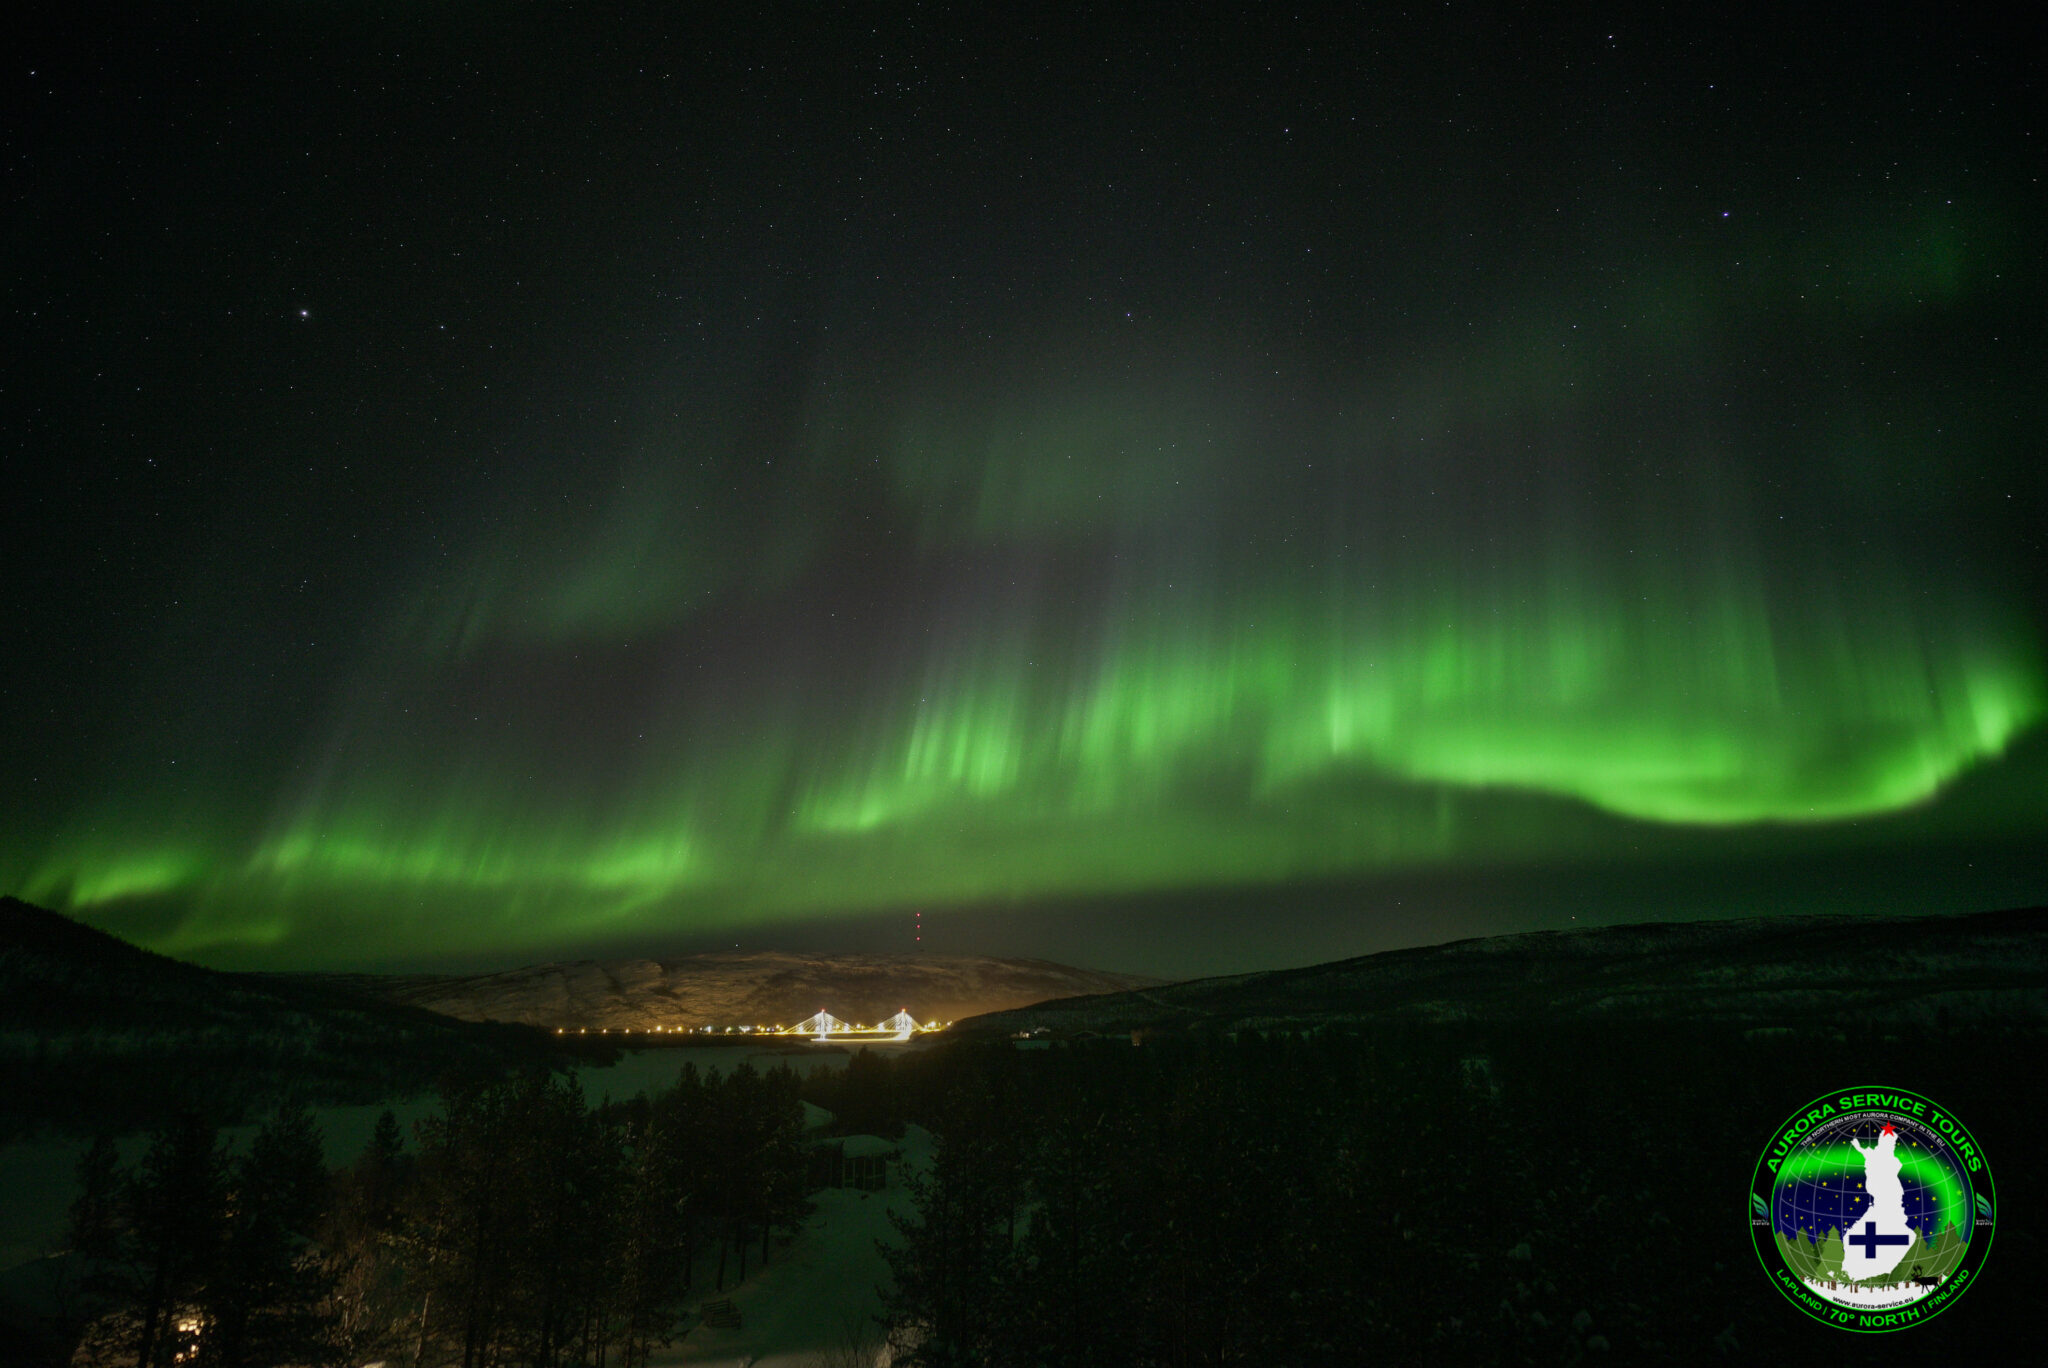
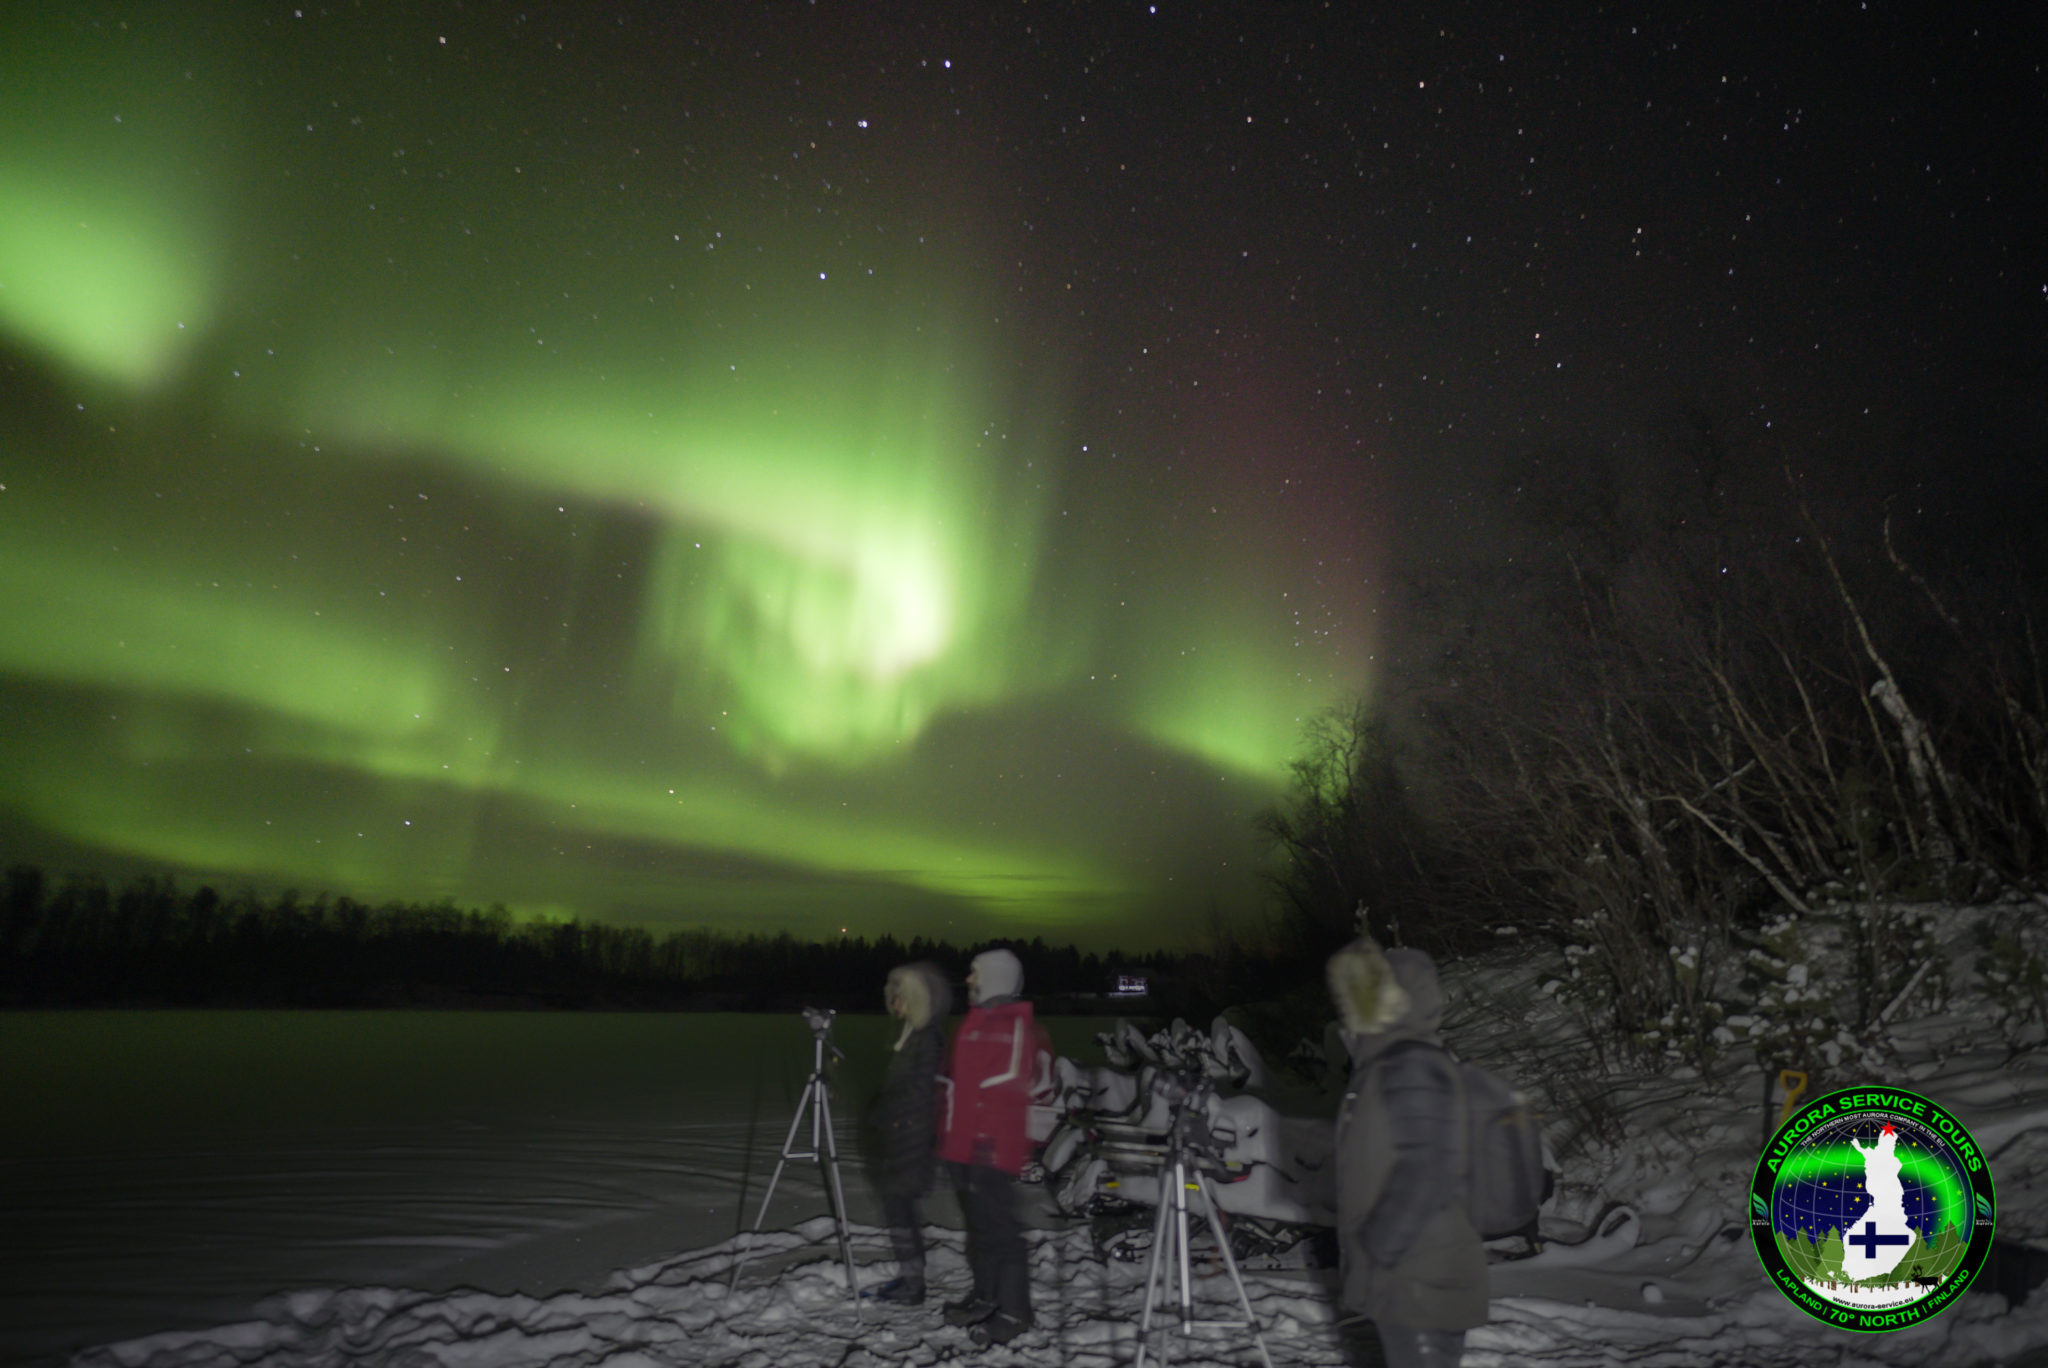
With northern lights, they are gently wafting across the sky, sometimes slowly, sometimes fast. In order to capture the detail of the aurora, aka the lines or curtains, we try to keep exposure time quite low. The image above was a 2 second exposure and I just about got the lines in. Those big vertical colourful lines of aurora were moving, so if I had of used a 10 second exposure, I probably wouldn’t have captured them in such detail and/or they would be quite blurry. So I like to keep a low exposure time as possible while keeping the image quite clean. So it’s a balancing act between aperture, noise (ISO) and exposure time. If your images are coming out noisy as heck, then lower the ISO a little and add another second onto your time and see how it looks. This is also good to practise in your yard at night time, because you will see how tweaking the settings will result in your images looking slightly better, or slightly worse.

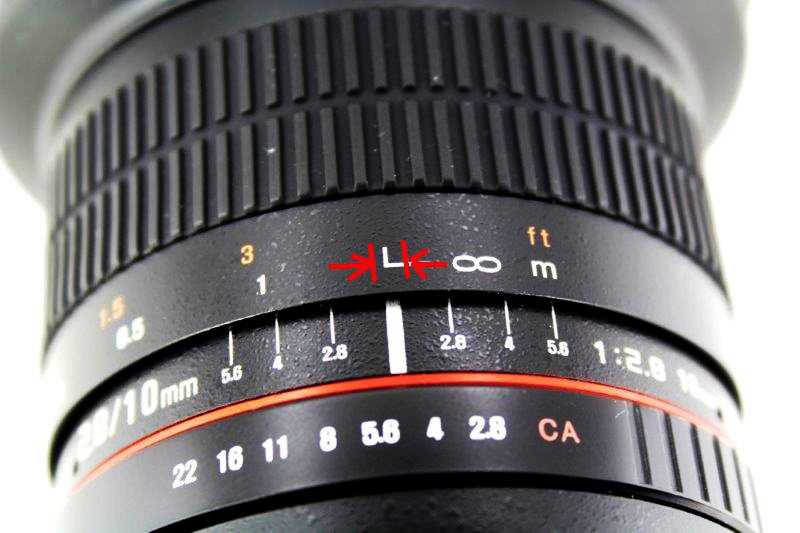
Your camera needs to be in manual mode and no flash. If you have it any other mode, the camera will try to expose the picture to 0 on the light meter (like it does in daytime). This is will make your night time pictures wildly over-exposed and too bright. So being in manual mode and you telling the camera to underexpose the image a little gives more realistic night time shots. So try to get the light meter to -1 and start shooting from there, fine tuning as necessary. If the aurora is very strong or if there is strong moonlight, you may need to drop it down a little further, even to -1.7 under exposed. Or if it is very dark and you really need to expose quite a long time to get details out of shadows or if the aurora is very weak and you want to bring it out more, you can even try exposing at 0 or even expose to the right (0.3 or even +1), but it is very rare that is needed. Or you can just ignore the light meter and use your eyes, if the pictures look great, who cares how exposed they were?! With experience you will find shooting by eye at night time does become quite easy, but starting off, it’s nice to have baseline camera settings you can use to get you shooting half decent images right away.
So here are a few of my settings I use. If it is very snowy with lots of moonlight, I’ll shoot at one or two seconds at F2, ISO 1600 or 3200. Trying to keep that light meter around -1.
If it is a new moon (dark as heck) then you really have to push the camera a little. On the darkest nights, I will use 8 or 10 seconds at ISO 3200 and f2, again aiming for -1 on the light meter, but occasionally 0. Pretty much ISO and aperture never change, just the exposure time does.
I hope this crash course in aurora photography has been somewhat useful and your aurora photographs are not a car crash. I can’t tell you exactly what settings to use, because every camera and lens is different, so what works for one might not work for another. The absolute best thing (just incase I never mentioned it…) is to get out with your camera in your area when it gets dark and start practising your night photography. This will carry over very well into aurora photography and you’ll be nailing some epic aurora photos right away, instead of fumbling in the dark.

Good luck in your night photography and aurora photography! Tag me into any instagram pics, I’d love to see them. @auroraservicetours
Clear skies,
Tony Bateman


 The dedicated northern lights holiday in Finland was conceived by us. We are the original!